
Valorant is one of the widely played games all over the internet not because it is free but because it has a legacy. Even I am the one who loves to play Valorant. With the new Update in Valorant, many users have reported to be having BSODs while playing Valorant such as Critical process died. Sometimes valorant force restarts pc and cause BSOD after the update. The problem has been reported all over the internet by Valorant users.
Valorant has recognized the issue of BSOD while playing the game and is working on it. However, somehow we have managed to find few fixes to resolve the issue of valorant force restart PC and cause BSOD after update. So have a look at them one by one and perform the same to fix the said issue. The problem of force restart pc is not limited to Windows 11 however most users are using Windows 11 as the data is collected from the internet.
If you are interested in the video, below is the direct video tutorial to fix Valorant Force Restart PC and Cause BSOD after the Update :
Fix Valorant Force Restart PC and Cause BSOD after Update by Updating the Windows
Issue of BSOD and forcing the PC to freeze and then restart while playing Valorant seems to be more active in PCs using the older version of Windows 11 and Windows 10. So first of all you need to update your Windows 11 or Windows 10 to the latest build to fix the issue of Valorant Force Restart PC and Cause BSOD after Update.
Open your settings menu and choose the option Windows update. Here click on the option check for updates and once the update is available select the option “Download and Install” to make sure your windows is up to date. As of today, Windows 11 has the latest version 22H2. So make sure you have the latest version of Windows and then restart your pc to fix Valorant Force Restart PC and Cause BSOD after Update. After restarting the pc play the valorant again and this will fix your issue.
Fix Valorant Force Restart PC and Cause BSOD after Update by running the Valorant game in Compatibility Mode
In order to fix Valorant BSOD while playing the game next method is to change how you play the Valorant by changing the compatibility settings of the Valorant.
Open up the properties of the Valorant by right-clicking on the Valorant icon and choosing the option properties.
Now choose the “Compatibility” tab and tick mark the option “Run this program in Compatibility mode” and select the “Windows 7” option from the dropdown list as shown below :
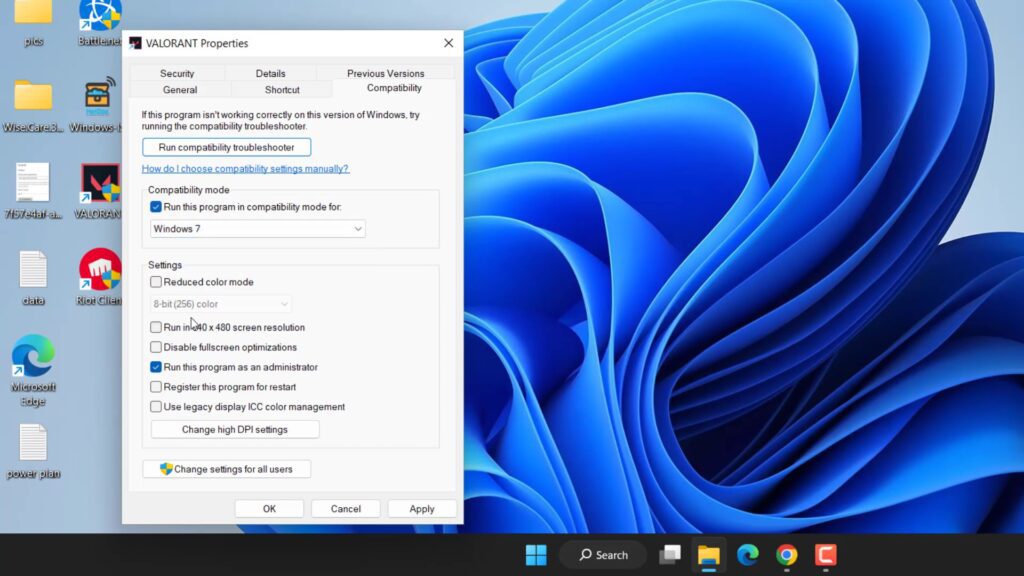
Once hit the apply and ok option to save the changes with the valorant and then try to play the game and check it Valorant still freezes your pc giving you still giving you any BSOD while playing the game.
Fix Valorant Force Restart PC and Cause BSOD after Update by Using High performance of your Graphic card
Many users have reported that they have fixed the issue of BSOD and system crashes while playing valorant by simply changing the performance of the graphic card while playing the valorant.
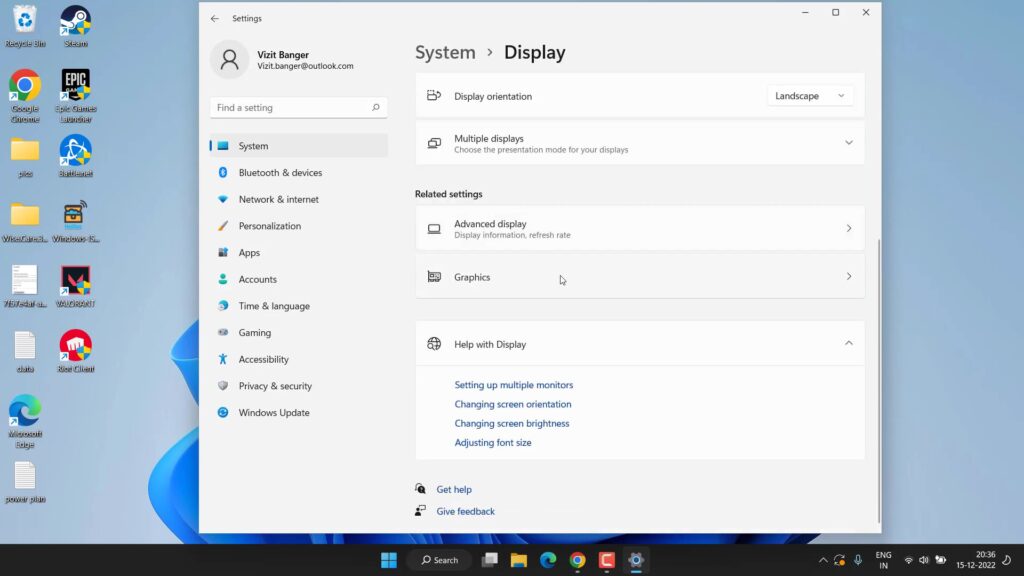
So, in order to change the performance of the graphic card, head over to the settings menu and click on the option “Display” Scroll down and click on the option “Graphics” as shown below :
Now in the graphics option, you need to find the valorant file in the list of programs to add the high-performance mode. If you don’t find “Valorant” in the program you need to add it manually.
Click on the browse option, this will open up small windows to provide the path. So select the path of the valorant game which is generally available in “C:/Riot Games/Valorant/Live/Valorant.exe”
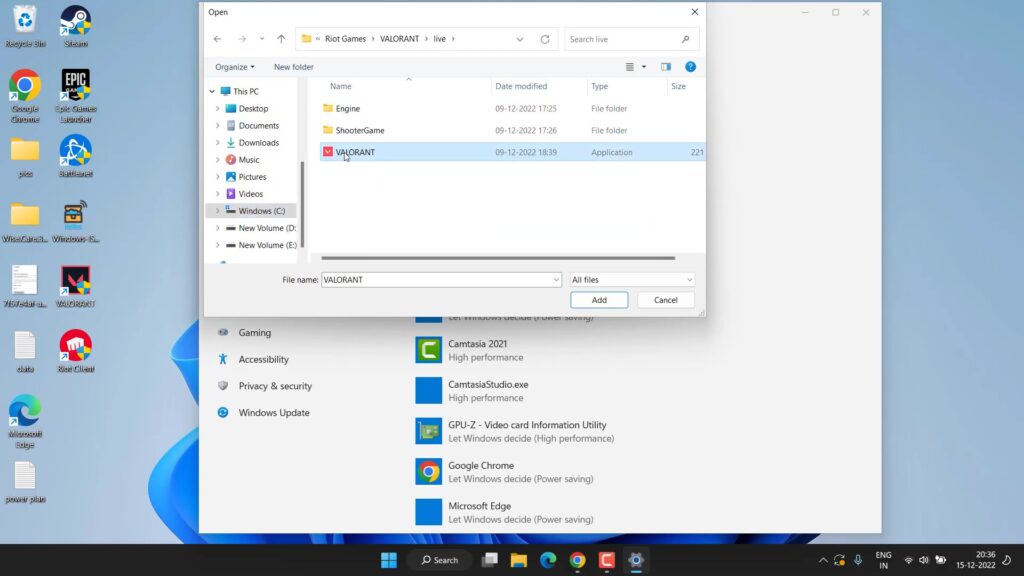
Double-click to add the Valorant.exe file to the list of programs. Once added click on the “option” menu and select high-performance mode.
This will give the high performance of GPU while playing the valorant to fix the issue of Force Restart PC and BOSD while playing the game.
You need to do the same with another Valorant also which is located in the path “C:/Riot Games/Valorant/Live/Shooter/Binaries/Win64/VALORANT-Win64-shipping.exe”
Once added again choose the option of high performance in the graphic card and play the game. This will fix the issue of Valorant Force Restart PC and Cause BSOD after Update in Windows 10 and in Windows 11
Valorant Force Restart PC and Cause BSOD after Update by increasing the VRAM
If the above method failed to help out and you have still encountered the issue of BSOD while playing Valorant and your system freezes too, that means you need to increase your VRAM as Valorant requires high RAM and disk usage and you may not have enough of them. So increasing VRAM will certainly fix the issue of BSOD and crashes while playing the Valorant in Windows.
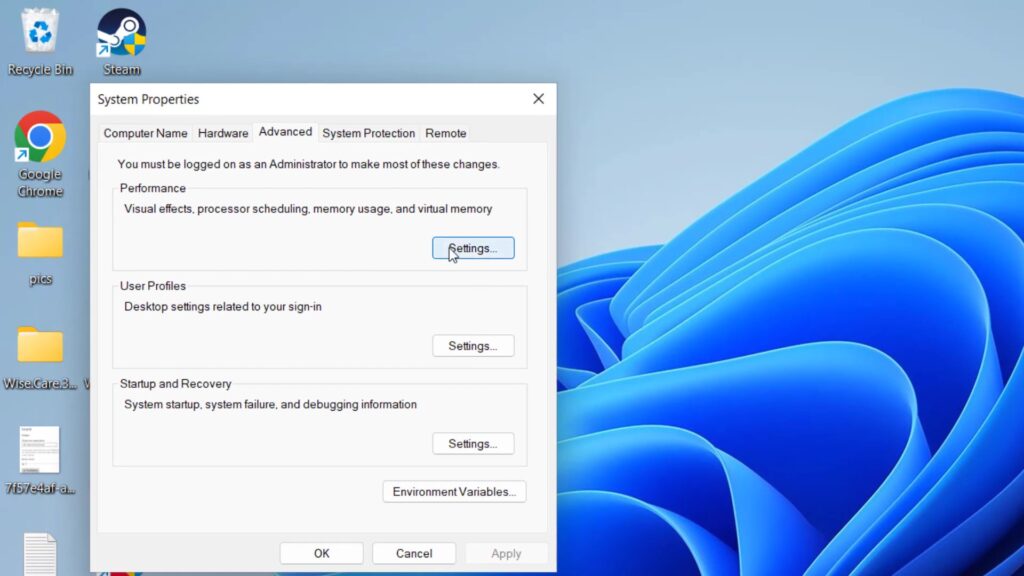
To increase VRAM, click on the start menu and type “Advanced system settings”
Open the first option available to you. This will open the advanced settings of your system. Now in advanced system settings select the “Advanced” tab and click on the option “Settings” under the performance as shown :
Now in the Settings menu, click on the “Advanced” tab to find the “Virtual memory option. In Virtual memory click on the option “Change”
Here uncheck the option “Automatically manage paging file size for all drives” and click on the option “Custom size”
Now, type Initial size(MB): 12000 and Maximum size(MB): 36000
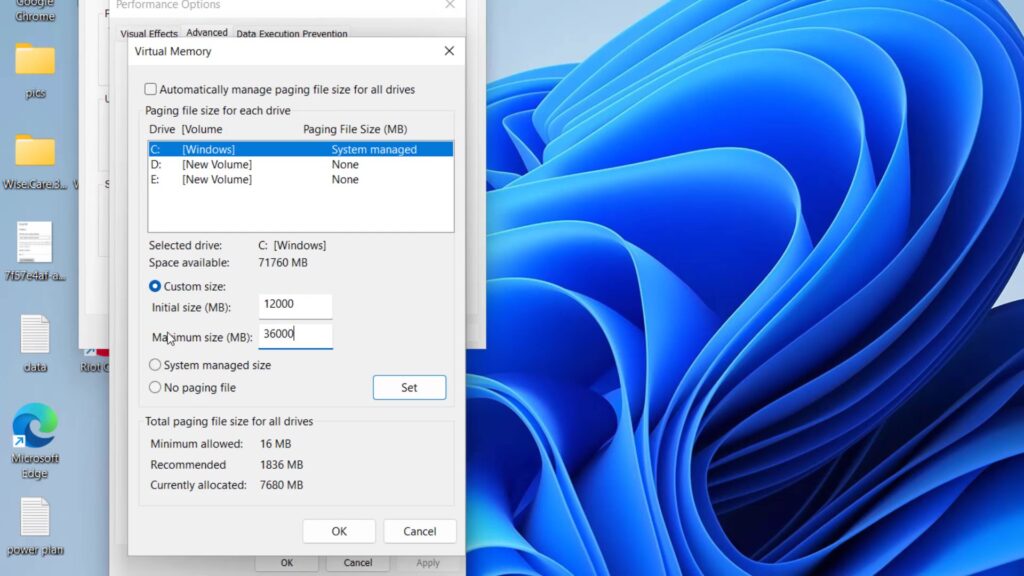
You can even increase the maximum size by up to four times the capacity of RAM in MB.
Now hit the “set” option and click on the ok button to save the changes to your system.
Now go ahead and restart your pc and try to play the Valorant again and check if you are still getting the issue of BSOD and the system freezes while playing the Valorant in Windows 11.
That’s all friends. This is all you have to do in order to fix Valorant Force Restart PC and Cause BSOD after Update while playing the game in windows 11.
Let me know in the comments if it doesn’t work out for you so that I can further provide you more support to fix the error “Valorant Force Restart PC and Cause BSOD after Update” and if you get another way to get rid of this problem do mention so that other viewers also get benefitted from the solution you provided to fix BSOD while playing the Valorant.
Read Next
- Valorant UnrealCEFSubProcess.exe high CPU Usage in Task Manager
- Valorant Please close other riot games products before signing out
- This Build of Vanguard Requires TPM Version 2.0
- FIFA 23 EA Anticheat Service Error
FAQ
How to fix Valorant keeps crashing on startup?
In order to fix Valorant crashes at startup, the first thing you need to do is to update your windows by heading onto your setting menu and choose the option check for update. Secondly, after updating you need to update the graphic drivers of your GPU by opening the device manager of your windows. depending upon the processor you have NVIDIA or AMD you need to select the corresponding driver to download and install them to fix valorant crashes at startup issue in windows 11.
How to VAN 9001 Error in Valorant?
Van 9001 error only occurred in Windows 11 because of the extra security of Windows 11 and so does the valorant. In order to fix VAN 9001 you need to enter into your BIOS menu and turn on both secure boot as well as TPM and then restart your PC to fix the issue.
How to fix this build of Vanguard requires TPM 2.0 and secure boot?
Valorant in Windows 11 requires both TPM, as well as Secure boot else you won’t, be able to play valorant in windows 11. So in order to enable secure boot and TPM you need to enter into your BIOS menu and find TPM as well as Secure boot so you can enable them. Make sure you disable CSM else you may not find the process of secure boot in the bios menu. Here is the detailed guide: This Build of Vanguard Requires TPM Version 2.0
