

A very popular Windows error Screen known to all for irritating us on every single boot that we make while turning on your PC is Preparing Automatic Repair which further result in “Automatic repair couldn’t repair your PC” in Windows 10. Many a times we think it’s a hardware issue or might be something wrong with the wires.But actually its a very basic problem related to windows system files, having a Automatic Repair Couldn’t repair your PC Screen is faced all of us have faced in all walks of life (I must say).With the help of Command Prompt, it’s simply a cake walk. And if you feel technically less aware, this tutorial is surely for you guys!
Here is the video tutorial to fix “Preparing Automatic Repair – Automatic Repair Couldn’t Repair Your PC”
It’s a 2 step to fix your Preparing Automatic Repair loop error and processed within few minutes, so be with me and lets begin.
Read Also: Microsoft store not downloading apps in Windows 10
STEP 1 to Fix Automatic Repair Couldn’t Repair Your PC: By Fix Boot Configuration Data
The Error Screen that we’re going to solve looks like a below image if you notice:

Here we will be repairing your boot configuration data which results in such errors.
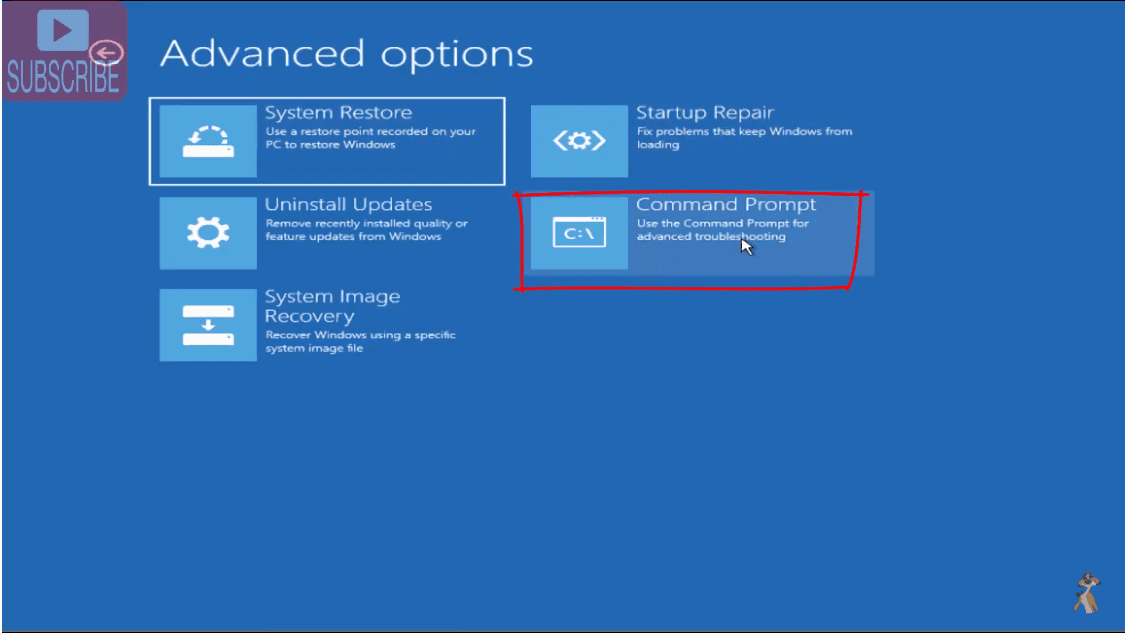
But before that we have to move-on with our Automatic Repair couldn’t repair your PC error screen by clicking on Advanced Options followed by Clicking Command prompt as below:
Advanced Options>Command Prompt
Now you don’t need to fear if you see a completely black screen in command prompt as if you are a coder.
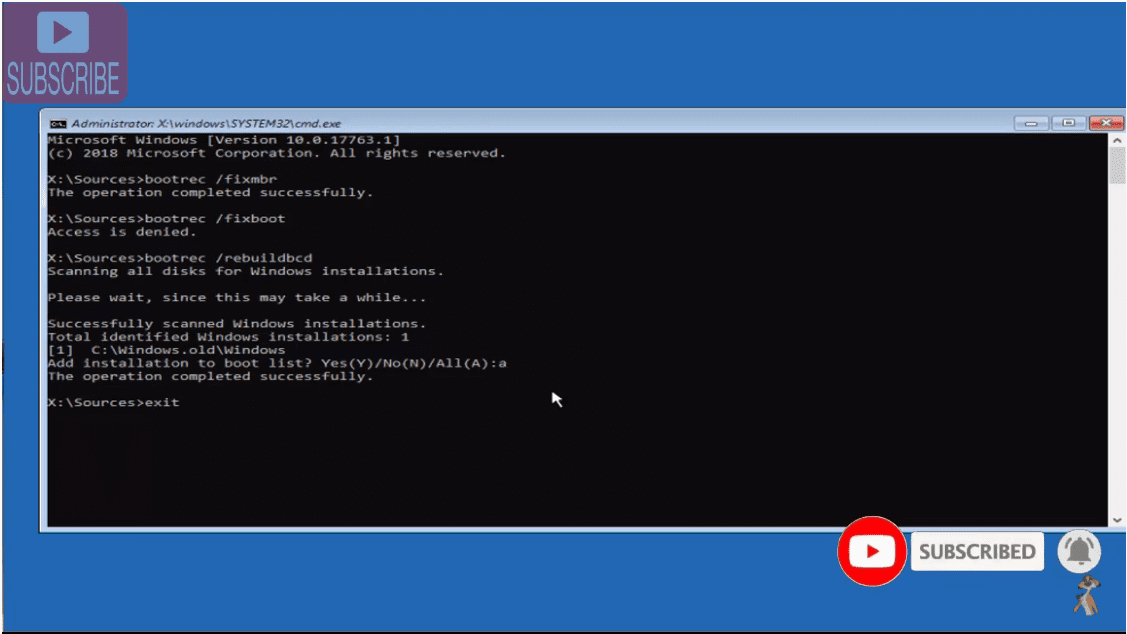
Just follow along and with the below 3 easy commands copied in your command prompt command you’re done as follows;
1.bootrec /fixmbr
2.bootrec /fixboot
3.bootrec /rebuildbcd
If you get any error while entering the command bootrec /fixboot please type the following command and than proceed with bootrec /fixboot again.
Bootsect /nt60 sys
Now once the command is completed you will see a similar screen as below:
Also Read: Top 10 Best Smartwatch Under 5000 In India 2021

Scanning all disk for windows installations by these 3 commands may take some time for repair, so just relax.

On successfully scanning windows installation, it will ask to Add installation to boot list?.
Simply type “A” and press enter key.
After that make an exit from command prompt by typing exit as follows.
You will have to turn off your PC and restart it, if the problem still persists, not to worry we have another alternative for this, follow our step 2.
STEP 2 to Fix Automatic Repair Couldn’t Repair your PC: Using Check Disk
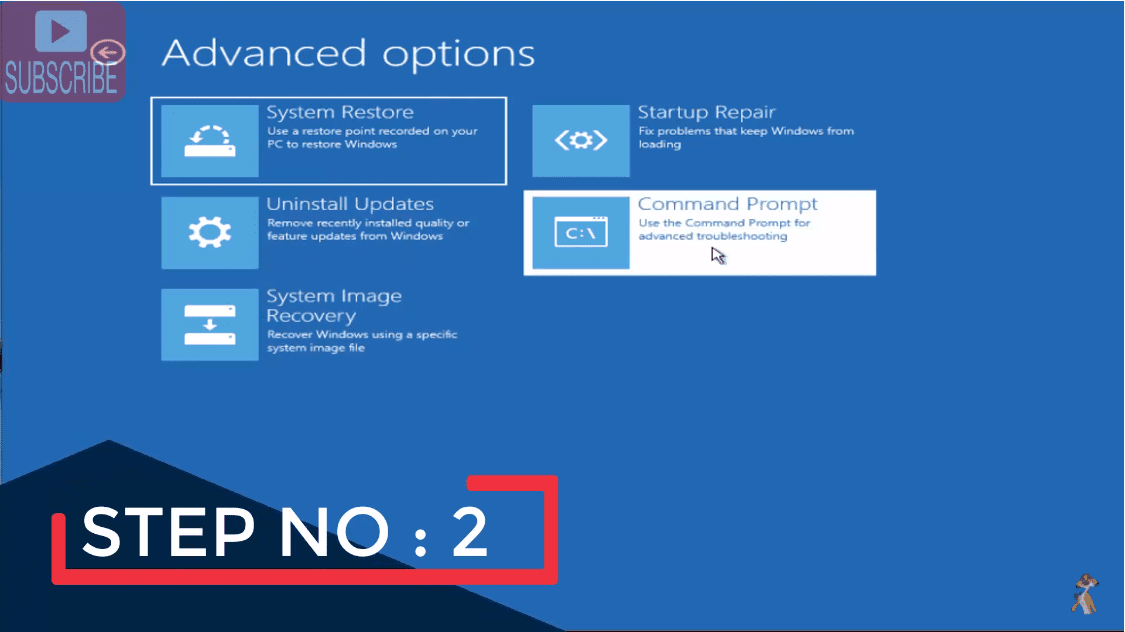
Once again Go-to Advance Options & Command prompt and follow the given Command Code.
Command we use for step 2 : CHKDSK C: /F /R
Here ‘CHKDSK’ means check disk, ‘F’ means fix & ‘R’ means Repair, so now you know the use of every command ,you will get following result on your PC Screen.

Now depending upon your PC system in will take not less than 15-20 minutes for the process to take place and that’s it.
Once the above command successfully completed type another command and hit enter key :
Dism /online /cleanup-image /restorehealth
Now after completing of both the commands your problem of “Preparing Automatic Repair” must be fix once you restart your system.
Also Check: How to Upgrade from Windows 10 Home to Windows 10 Pro for free
Final Words- In the above article we have shown you two best possible and easiest method to fix “Automatic repair couldn’t repair your PC” in your windows 10. It not only works with windows 10 but also works perfectly for Windows 8 as well as windows 7. You can email us by mentioning your screen error, if the problem still remains unsolved or if you face any kind of issue while running your windows 10. We are always there to support you.

Hours of frustration has finally brought me here. I had my Hope’s up 1 last time after recognizing a windows installation by plugging back in my external drives. “Failed to transfer logged messages to the event log with status 50 is the message that I am receiving” I will Pay Pal you generously if you can help me get windows open again. Thank you, Geoff
Error 50 comes due to failure in hard drive or in windows file. I suggest you to run system file checker. Open command prompt using bootable media and type the following command one by one and hit the enter button :
chkdsk c: /r /f /v
Sfc /scannow
Dism /online /cleanup-image /restorehealth
There are the three commands that need you enter one by one. Each command will take its time so be patient while performing. Let me know the result with error if unable to perform the commands